Introduction
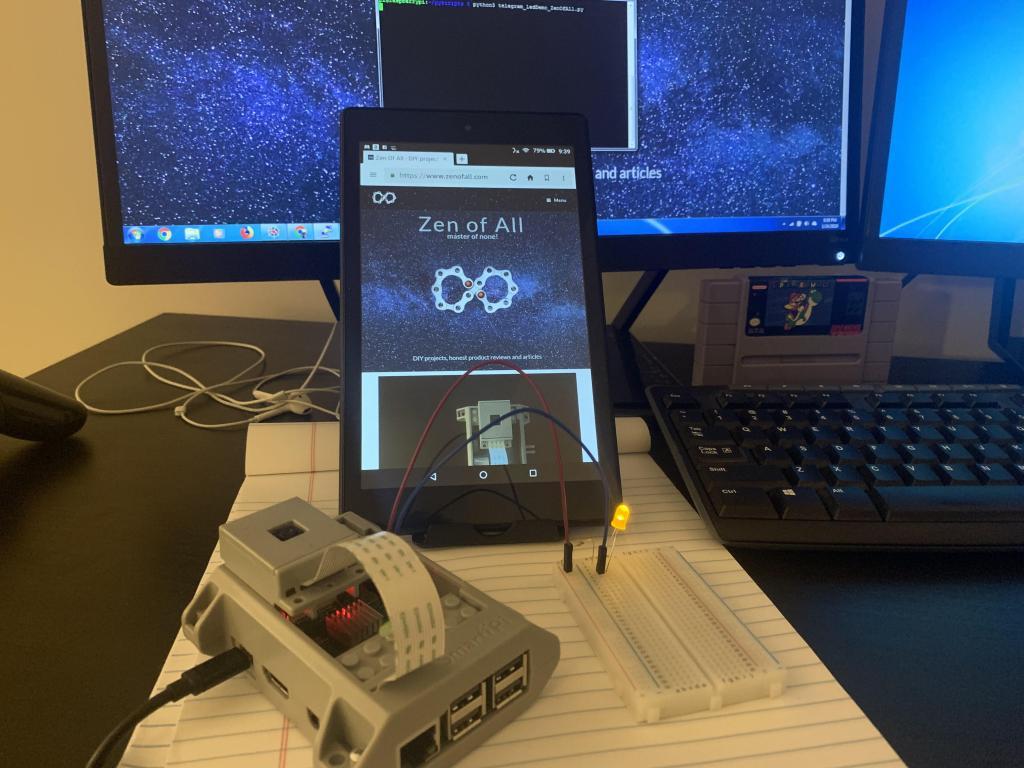
In this post I want to give a proof of concept of how Raspberry Pi can be used for home automation, using a telegram bot and python.
Telegram is a messaging app like whatsapp, which allows any user to create a bot.
A bot is an automated application that can accept commands from telegram users and give a response or perform action. More information about telegram bot can be found here.
The objective of this demo, is to text the telegram bot commands and have the bot respond by performing various actions – in this demo the action being turning on an LED connected to GPIO pin 4.
This same concept can be used to build various IoT applications, one idea would be to connect an RF transmitter which transmits to rf receivers or relay switches thus turning various electrical devices on or off, I have done this to control a sprinkler system and also to control lights in my home.
The steps involved in this project are:
- Create a telegram bot
- Install python library for telegram bot
- Write a python script
- Make the circuit
- Test it out
Telegram bot
To create a telegram bot, first download the app on your phone and then search for user ‘BotFather’, which as the name suggests is a bot that creates other bots.
Send the message “/start” to BotFather and it will display a list of commands that you can use with BotFather.
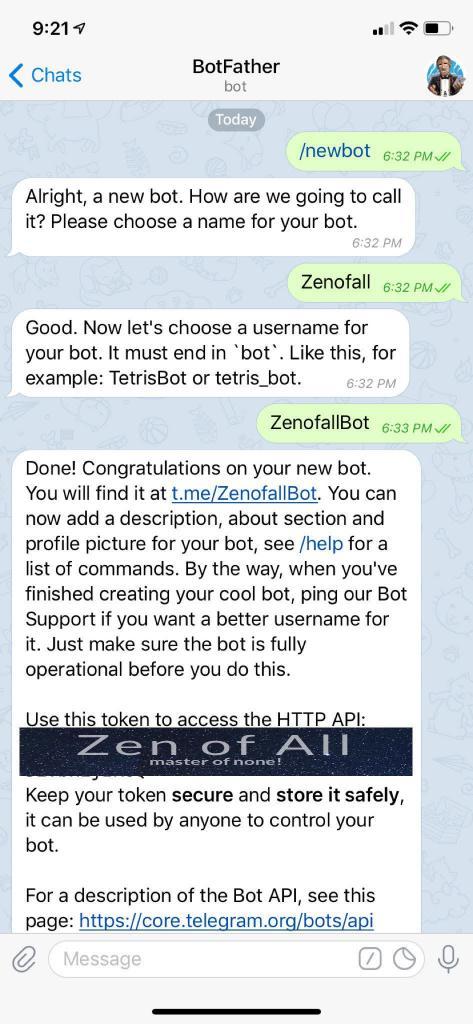
The command we need is ‘/newbot’ after you send this command BotFather will guide you through the steps to create your new bot, finally it will give you a token which will be used to authorize your bot.
You can check if your bot is properly created by opening your favorite browser (Internet Explorer…just kidding) and typing:
https://api.telegram.org/bot<token> /getMe
replace the token with your token string which generally looks like this: 412215502:AAJy2G0mwFHM7vj1n_y4iCH05EVbHEjIp6Q
So your string will look like:
https://api.telegram.org/bot412215502:AAJy2G0mwFHM7vj1n_y4iCH05EVbHEjIp6Q /getMe
(please note above is a made up token, you should use your token.)
You will get a response on your browser the same as this:{"ok":true,"result":{"id":412215502,"is_bot":true,"first_name":"Zenofall","username":"ZenofallBot"}}
This means the bot is created successfully.Install Python Library
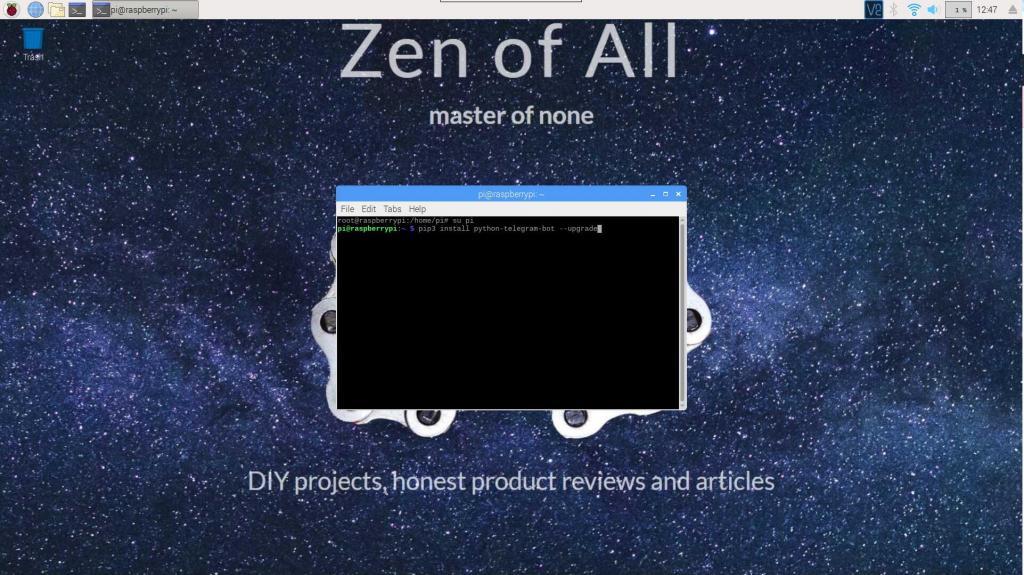
To run the telegram bot on your raspberry pi, we will need to install telegram libraries which wrap the api interface that telegram provides and give us a neat python interface. There are several libraries out there, but the one I prefer is the following: https://pypi.org/project/python-telegram-bot/ You can definitely visit the website to learn more. The installation instruction is actually very simple, just open a terminal on your Raspberry Pi and type:pip3 install python-telegram-bot --upgradeNote: I use ‘pip3’ and not just ‘pip’ because by default there are two versions of python installed on raspberry pi and i want the library for ver3.
Download the ledDemo.py script
I have written the script and uploaded it to github, log in to your zenofall account to download the script from github link, which will appear as soon as you login.
If you have not created the account please register and create the account on zenofall.com.
After you download make sure you open the script and modify the following line:
updater = Updater(token='YOUR TOKEN GOES HERE') #This is where you enter token.
Use the token from step 1 ‘create telegram bot’ and replace the ‘YOUR TOKEN GOES HERE’ with it.
So as an example it should look like:
updater = Updater(token='412215502:AAJy2G0mwFHM7vj1v_y4iCH05EVbHrjIp6Q ')
[Note this is just an example and above is a made up token so don’t copy paste it]
Make the circuit
You will need the following to make the circuit:
- Bread board
- Led
- 330 Ohm resistor
- Two female-male wires
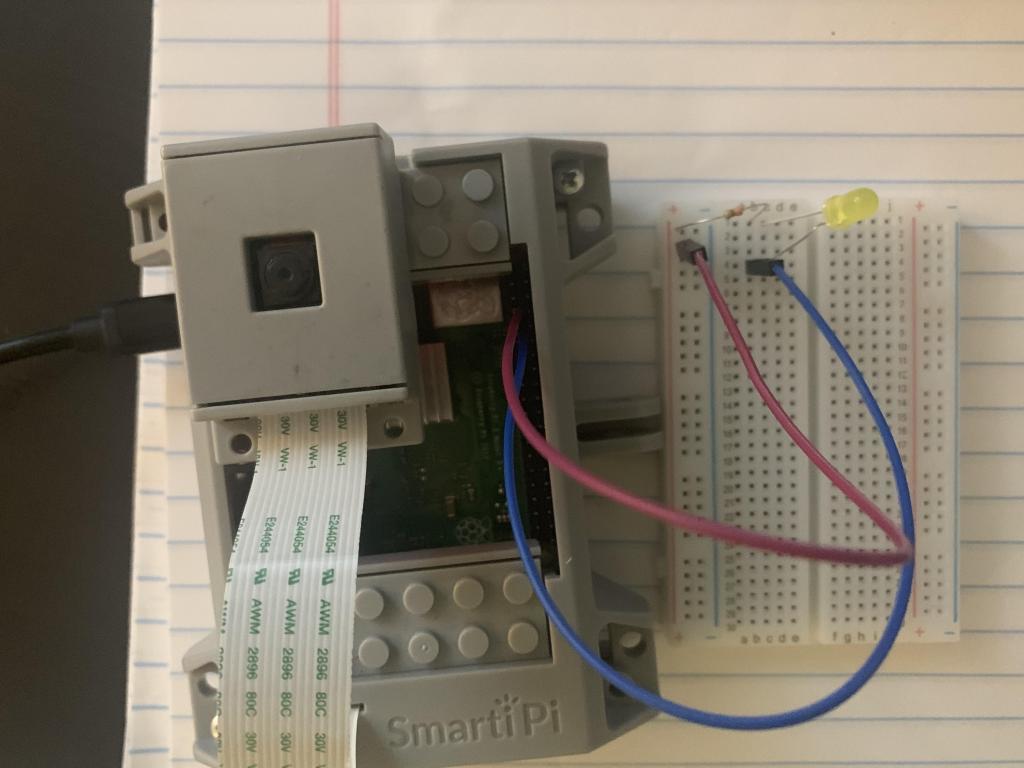
Connect the positive end to GPIO pin4
Connect the other end to pin5 – ground.
refer the pic below:
For more details on designing the circuit refer this page.
Note: the above link uses gpio 17 and i use gpio 4, so make necessary adjustments in code or while doing physical connections.
Veritas liberabit vos (the truth shall liberate you)
- Log into your Raspberry Pi
- Transfer script to the Pi using winscp – make sure you have modified the script with your token.
- Open terminal and browse to script location, I usually put my scripts in: /home/pi/pyscripts
Type following commands:
cd /home/pi/pyscripts

python3 ledDemo.py
- Get your phone and open telegram app
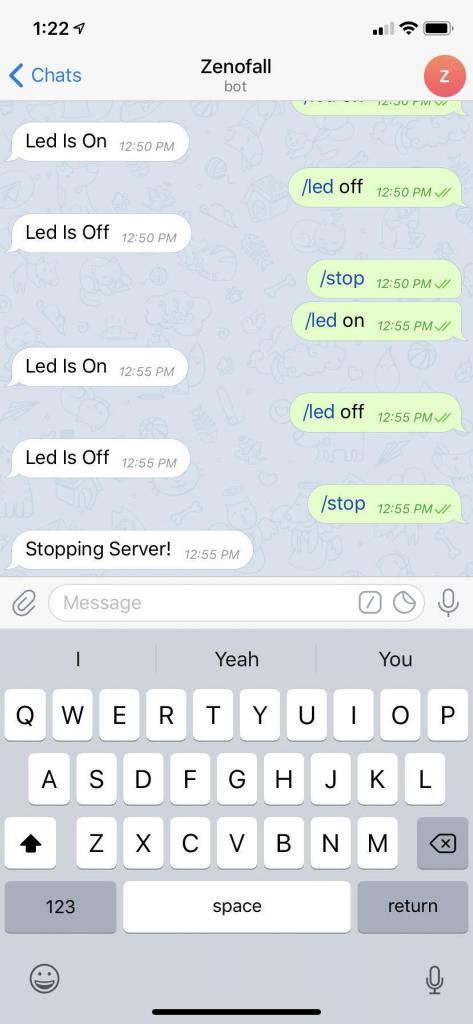
- Find your bot by name in ‘search’ and send it the commands:
/start
It should respond:
“Private Bot- Only responds to registered users!Bye…”
/led on
This will turn on the led
/led off
This will turn off the led
- It is very important that you stop your bot elegantly, to do this you can type:
/stop
That’s it now you have taken the first step towards using your Raspberry Pi as an IoT device.
You can simply replace the Led with a relay or a rf transmitter (provided you have rf receivers) and automate various devices around your home.
I will talk about rf transmitter and receiver chips in another post.

